Excel Guide: Troubleshooting printing errors |
您所在的位置:网站首页 › excel change page size › Excel Guide: Troubleshooting printing errors |
Excel Guide: Troubleshooting printing errors
|
Account Information
Share with Your Friends
How to print from Microsoft Excel and avoid printing problems  by
Lance Whitney
in
Software
on
December 5, 2022, 8:39 AM PST
How to print from Microsoft Excel and avoid printing problems
by
Lance Whitney
in
Software
on
December 5, 2022, 8:39 AM PST
How to print from Microsoft Excel and avoid printing problems
Printing in Excel can cause some issues, especially when you need your documents fast. Use these methods to avoid your worst printing nightmares. We may be compensated by vendors who appear on this page through methods such as affiliate links or sponsored partnerships. This may influence how and where their products appear on our site, but vendors cannot pay to influence the content of our reviews. For more info, visit our Terms of Use page. Image: Araki Illustrations/Adobe Stock Image: Araki Illustrations/Adobe Stock
You’ve just sent an Excel spreadsheet to your printer, but when you check it, you discover that the spreadsheet didn’t print right. Maybe it printed in portrait mode when it should’ve printed landscape; perhaps a certain section of your spreadsheet never printed or the spreadsheet took too many pages to print. Whatever went wrong, you can avoid many printing problems in Excel by following certain tips, such as tweaking the margins, setting the print area, scaling the sheet to print and choosing the right sheet options. What you need to print from ExcelFor these steps, I’m using Microsoft Excel as part of a Microsoft 365 subscription, but most of the advice here applies to the past few versions of Excel as well. How to check the orientation before printing Excel spreadsheetsThis may seem obvious, but check the orientation before you print. That usually — but not always — means landscape mode. To check this, select the tab for Page Layout and click the icon for Orientation (Figure A). Figure A 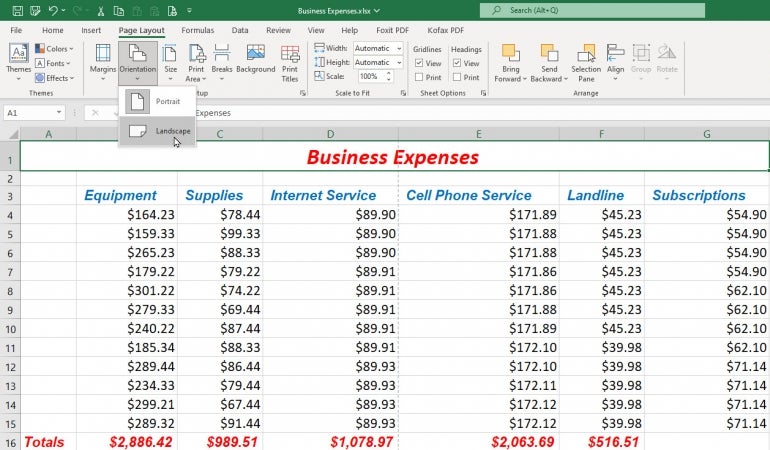 Image: Lance Whitney/TechRepublic Image: Lance Whitney/TechRepublic
Next, look at your page margins. From the Page Layout Ribbon, click the icon for Margins. To minimize the number of printed pages, choose the option for Narrow or select Custom Margins and set up your own. Remember to leave at least a little space for margins to give your printed spreadsheet room to breathe (Figure B). Figure B 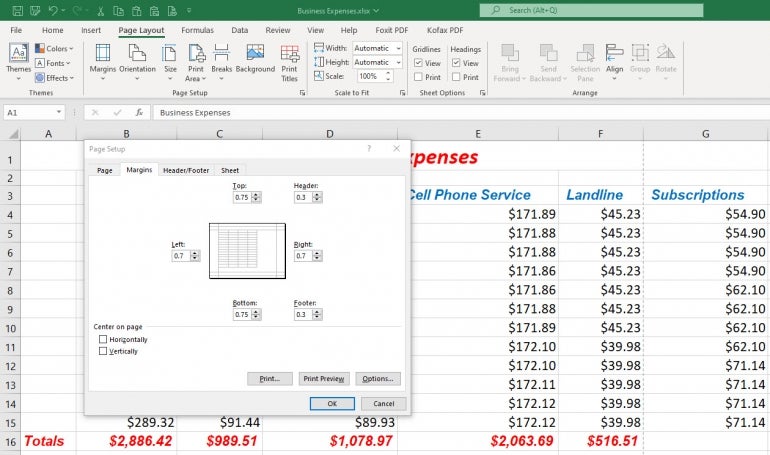 Image: Lance Whitney/TechRepublic
How to clear or set the print area before printing Excel spreadsheets Image: Lance Whitney/TechRepublic
How to clear or set the print area before printing Excel spreadsheets
If your Excel spreadsheet isn’t printing properly, clearing or setting a print area can often help. Sometimes the wrong print area has already been set, in which case you want to clear it. SEE: Google Workspace vs. Microsoft 365: A side-by-side analysis w/checklist (TechRepublic Premium) To do this from the Page Layout Ribbon, click the Print Area icon and select Clear Print Area. If you now want to redefine the print area, select the cells that you want to print. Click the Print Area icon and select Set Print Area (Figure C). Figure C 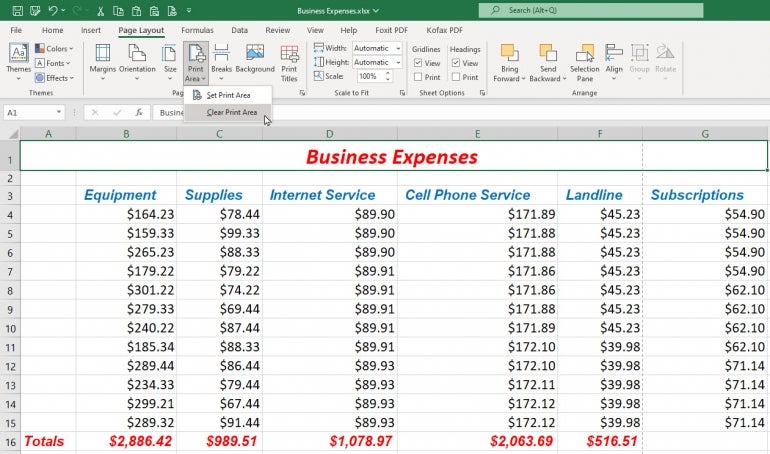 Image: Lance Whitney/TechRepublic
How to set a page break before printing Excel spreadsheets Image: Lance Whitney/TechRepublic
How to set a page break before printing Excel spreadsheets
If your spreadsheet contains a lot of rows or columns, it may break at an inappropriate place when you print it. To fix that, you can manually set a page break. To set a horizontal page break, select the row where you want the printed page to break. To set a vertical page break, select an entire column. At the Page Layout Ribbon, click the Breaks icon and select Insert Page Break (Figure D). Figure D 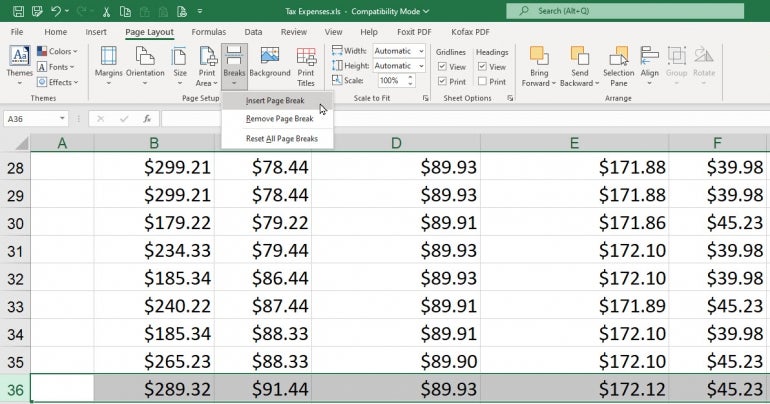 Image: Lance Whitney/TechRepublic Image: Lance Whitney/TechRepublic
To remove the break, select the same row or column, click the Breaks icon, and select Remove Page Break. If you’ve created multiple page breaks that you want to remove, choose the option to Reset All Page Breaks (Figure E). Figure E 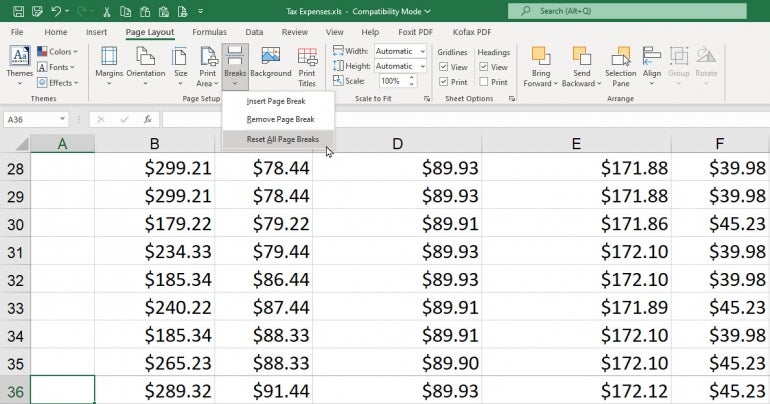 Image: Lance Whitney/TechRepublic
How to check preview before printing Excel spreadsheets Image: Lance Whitney/TechRepublic
How to check preview before printing Excel spreadsheets
Now might be a good time to see how your spreadsheet will look when printed. Press Ctrl+F2 to jump into Print mode where you can preview the spreadsheet. You can then bounce from one page to another. When done, click the left arrow at the top to return to regular view (Figure F). Figure F 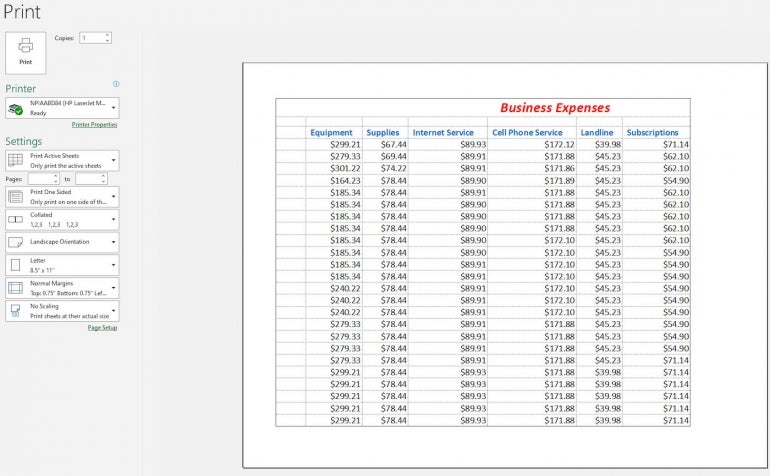 Image: Lance Whitney/TechRepublic
How to scale to fit before printing Excel spreadsheets Image: Lance Whitney/TechRepublic
How to scale to fit before printing Excel spreadsheets
Another way to control the printing on multi-page spreadsheets is by setting a certain width, height or scale. At the Page Layout Ribbon, click the dropdown box next to Width. From here, you can set a specific number of pages to print across. For example, if you want to squeeze a wide two-page spreadsheet onto one printed page, select the option for 1 page. Click the dropdown box next to Height. If you want to squeeze a long two-page spreadsheet onto one printed page, select the option for 1 page. If you want to shrink your spreadsheet to a certain percentage both in width and height, click the down arrow next to Scale or type a specific number, such as 75% (Figure G). Figure G 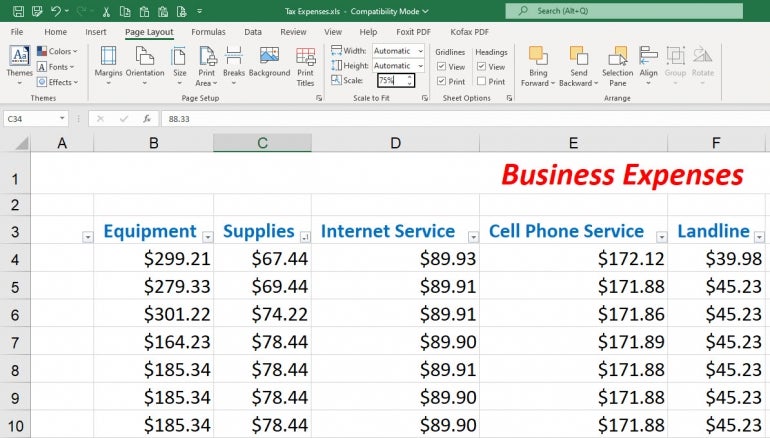 Image: Lance Whitney/TechRepublic
How to set advanced options before printing Excel spreadsheets Image: Lance Whitney/TechRepublic
How to set advanced options before printing Excel spreadsheets
You can tweak your printed pages further by delving into the full Page Setup dialog box. To get there, click the small square in the lower right corner of the Page Setup section of the Page Layout Ribbon. At the tab for Page, you can adjust the scaling to a certain percentage as you did from the Ribbon, but you can also set a specific number of pages for both the height and the width (Figure H). Figure H 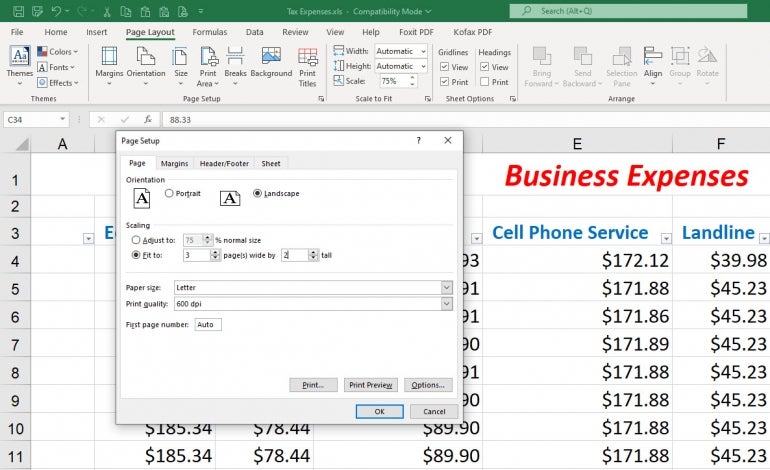 Image: Lance Whitney/TechRepublic Image: Lance Whitney/TechRepublic
Click the Margins tab to adjust the margins or center the rows or columns for a small spreadsheet. Click the Header/Footer tab to create, revise, or remove a header or footer. Finally, click the Sheet tab. Here, you can set the print area and print titles. You can opt to print or not print gridlines and other visual marks, and you can choose the order of pages to print, either Down Then Over or Over Then Down (Figure I). Figure I 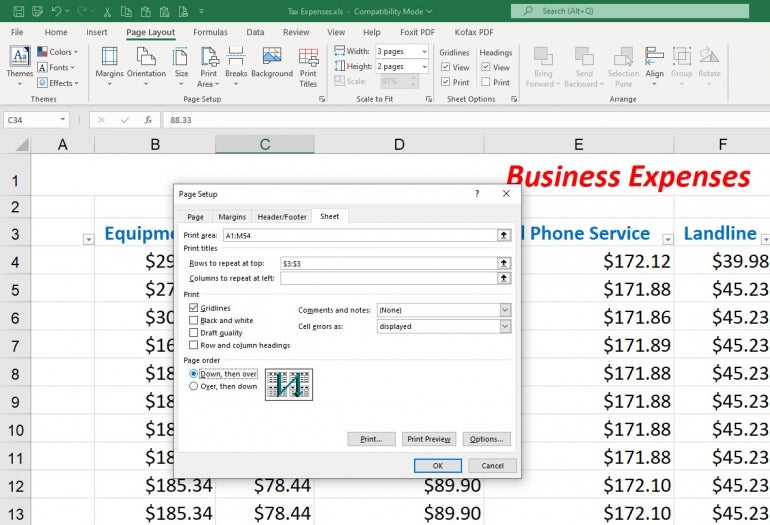 Image: Lance Whitney/TechRepublic Image: Lance Whitney/TechRepublic
If you’re on the hunt for more Excel-lent tips, have a look at a quick way to delete or remove blank rows and how to import Excel records into an Outlook Calendar.  Microsoft Weekly Newsletter
Be your company's Microsoft insider by reading these Windows and Office tips, tricks, and cheat sheets. Delivered Mondays and Wednesdays Sign up today Lance Whitney Published: December 5, 2022, 8:39 AM PST Modified: December 6, 2022, 6:39 AM PST See more Software Also See How to become a cloud engineer: A cheat sheet (TechRepublic) 50 time-saving tips to speed your work in Microsoft Office (free PDF) (TechRepublic) How to add a drop-down list to an Excel cell (TechRepublic) More must-read Microsoft-related coverage (TechRepublic on Flipboard) |
【本文地址】